Give Your AI Characters Eyes & Ears in Unreal Engine: Streaming Vision + Hands-Free AI Voice Interaction

By
Convai Team
December 2, 2025

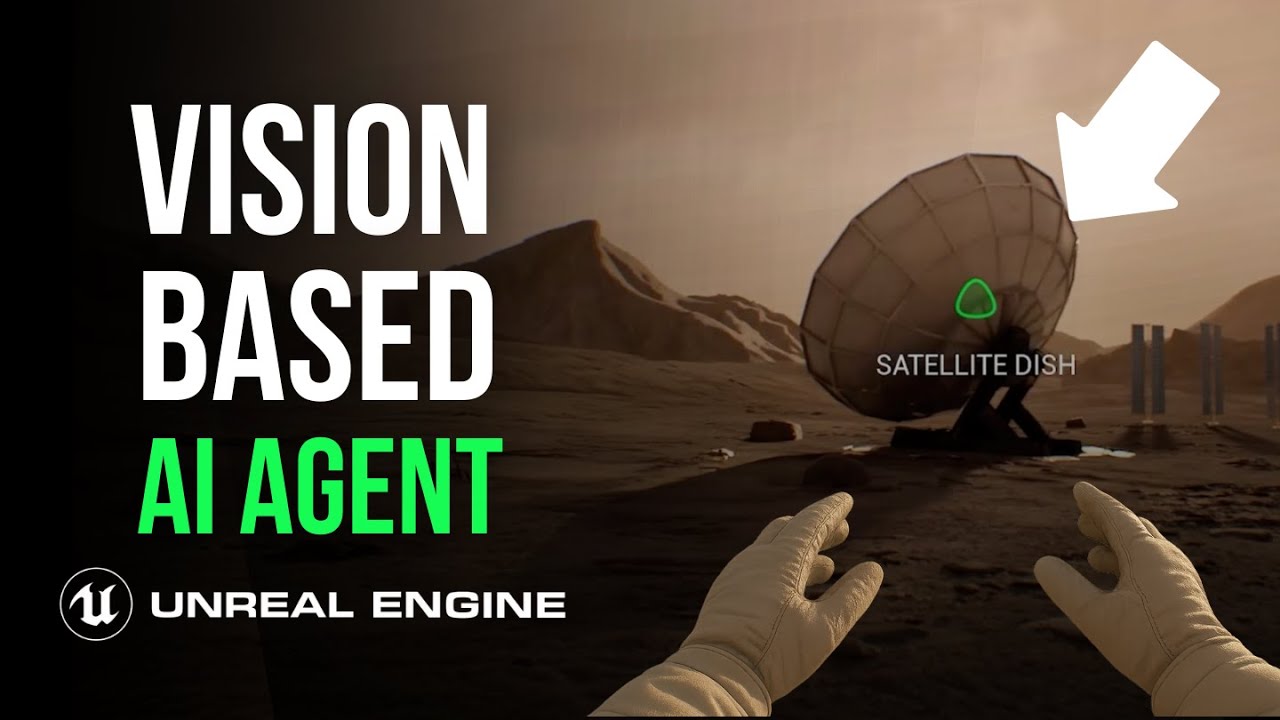
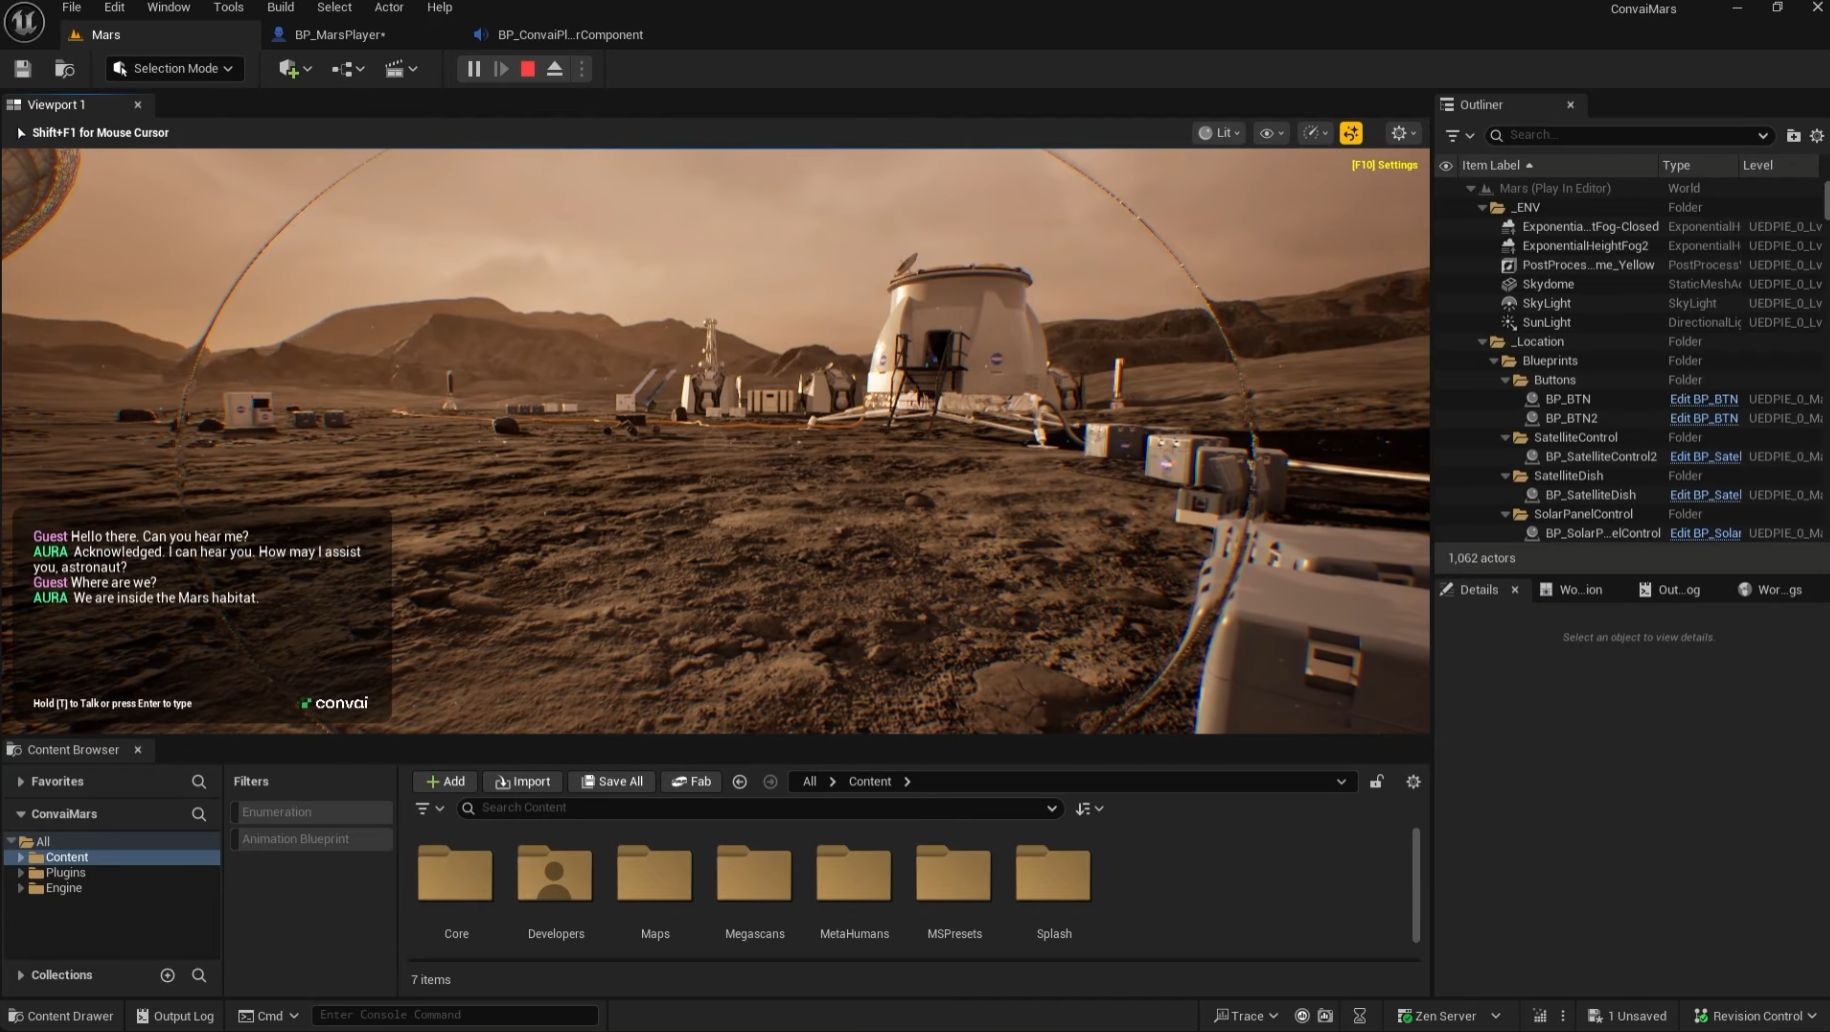
You’re on Mars. The solar network is down, comms are failing, and an AI voice in your suit says:

“Your mission objectives are to repair the solar power network. Can you do a quick check on the main panel?”

You look up at the array and ask: "Hey, what is that?"

The AI answers based on what it sees from your helmet camera, and you never touch a key.

This is what Convai’s Unreal Engine plugin (Beta) is built for: streaming vision input + hands-free voice. It lets you build an AI character that can see the world and talk you through it in real time.

In this guide, we’ll walk through exactly how to build that experience:

  1. The Setup: Installing the plugin and wiring the AI into your player.
  2. The Voice: Flipping from "push-to-talk" to hands-free.
  3. The Vision: Giving the AI a live camera feed so it can see what you see.

See it in action in the detailed walkthrough below:

What this plugin actually gives you

Conceptually, you’re dropping a Jarvis-style assistant inside your character. It lives in the same blueprint, sees what the player sees, and talks them through missions.

Powered by the Live Character API (WebRTC), you get:

  • Low-latency conversation: It feels like a live teammate, not a laggy chatbot.
  • Hands-free speech detection: No constant key-holding required.
  • Streaming vision: The AI processes a live video feed from an in-scene camera.

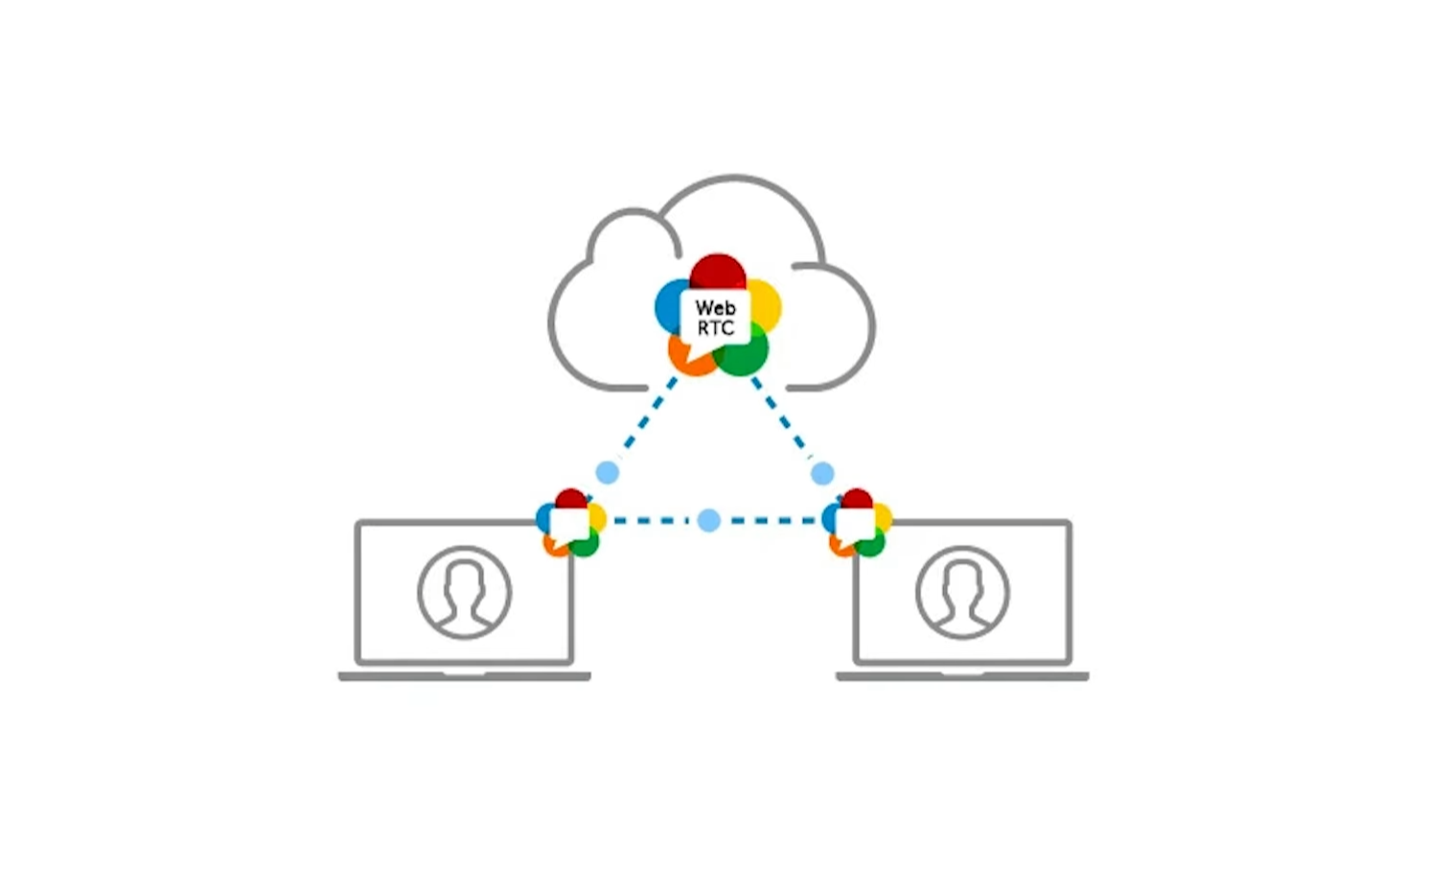
(Note: This is a Beta plugin. Lip-sync isn’t supported just yet, but the core brain/vision loop is ready to rock.)

Step 1: Install the Convai Unreal Plugin

You only have to do this once.

  1. Download: Go to the Convai Unreal SDK releases page on GitHub and grab the latest .zip.
  2. Install: Extract the Convai folder.
    • Engine-level (Recommended): Drop it into Engine/Plugins/Marketplace.
    • Project-level: Drop it into YourProject/Plugins/Convai.
  3. Enable: Open your project, go to Edit → Plugins, search for "Convai", enable it, and restart the editor.

Step 2: Connect Your Account

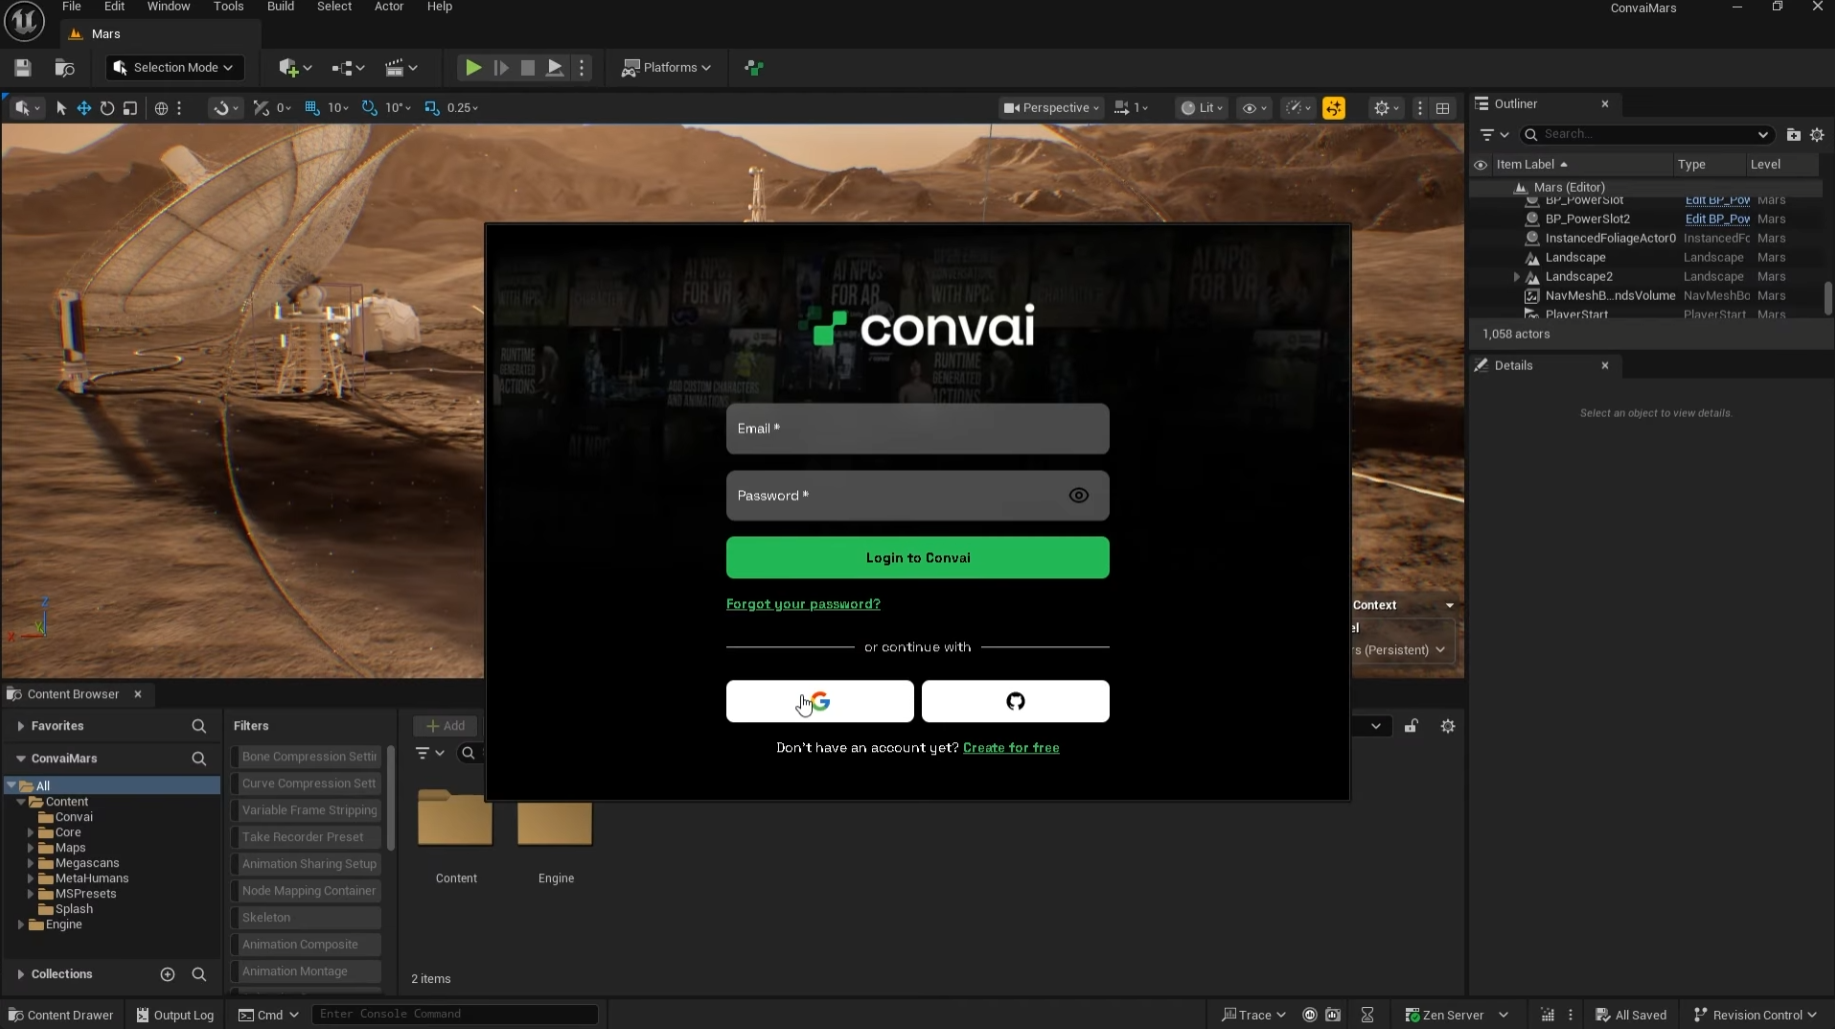
Once Unreal restarts, the Convai setup panel should pop up.

  1. Log in with your email or Google account.
  2. Once authenticated, you’ll see the Convai dashboard inside the editor.

Your engine is now connected. Time to wire a character into your player.

Step 3: Put the AI “Inside the Suit”

Technically, we are adding Convai components directly to the Player Blueprint.

3.1 Find your Player Blueprint

If you aren't sure which blueprint controls your player:

  • Press Play.
  • Click Eject in the viewport to detach the camera.
  • Select your player character in the World Outliner.
  • Click Edit Blueprint in the Details panel.

3.2 Add the "Ears" (Convai Player Component)

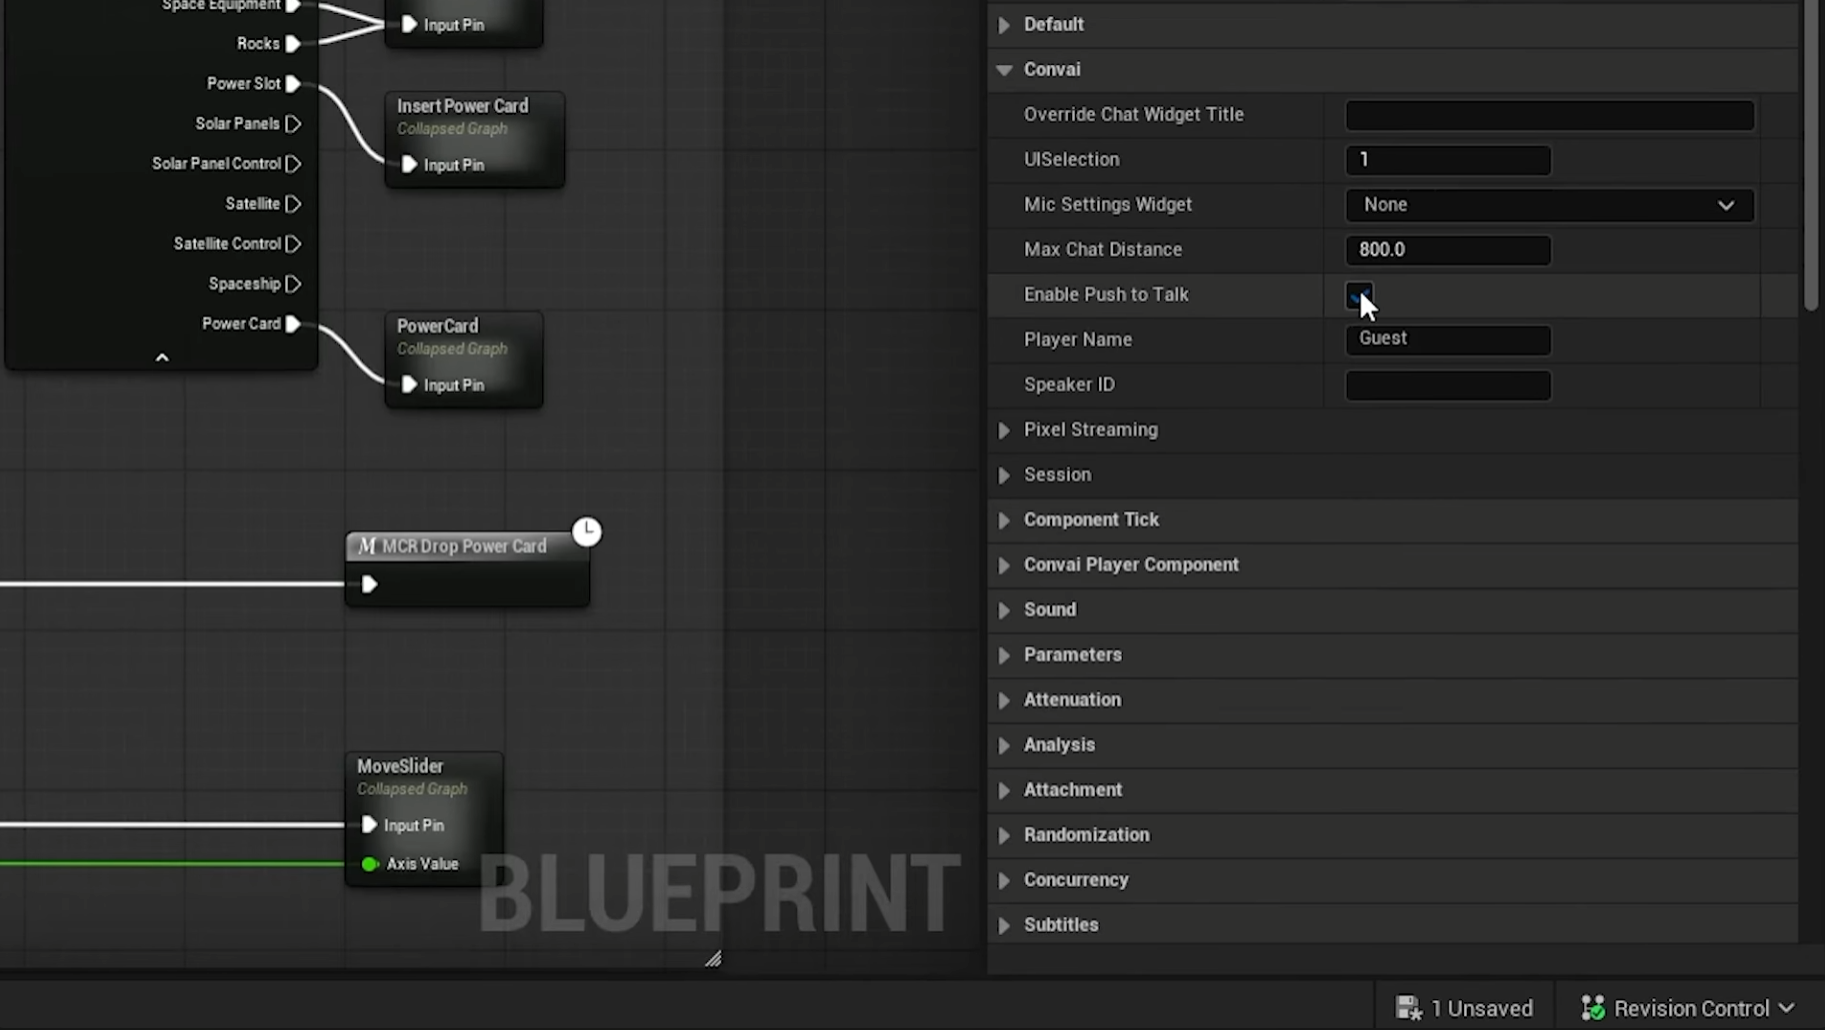
In the Components panel, click + Add and select BP_ConvaiPlayerComponent. This handles microphone input and the chat UI.

  • Test it: You can hit Play right now. You should see Convai’s on-screen widget (push-to-talk is on by default).

3.3 Add the "Brain" (Chatbot Component)

Click + Add again and choose BP_ConvaiChatbotComponent. This handles the reasoning and API connections.

Now, give it a personality:

  1. Open Convai Playground in your browser.
  2. Create or select a character (e.g., "Mars Mission Assistant").
  3. Copy the Character ID.
  4. Back in Unreal, select BP_ConvaiChatbotComponent and paste the ID into the Character ID field.

Compile & Save.

Hit Play, hold T (default), and say "Can you hear me?" If it responds, "Acknowledged, astronaut," you've got a voice in the suit.

Step 4: Switch to Hands-Free

Push-to-talk is great for testing, but for a "working" simulation, you want flow.

  1. Select BP_ConvaiPlayerComponent.
  2. In the Details panel, uncheck Enable Push To Talk.
  3. Compile and Play.

Now just talk. "Hey, are you online?" The AI should reply: "Acknowledged. I’m listening."

Step 5: Turn on Streaming Vision (The "Eyes")

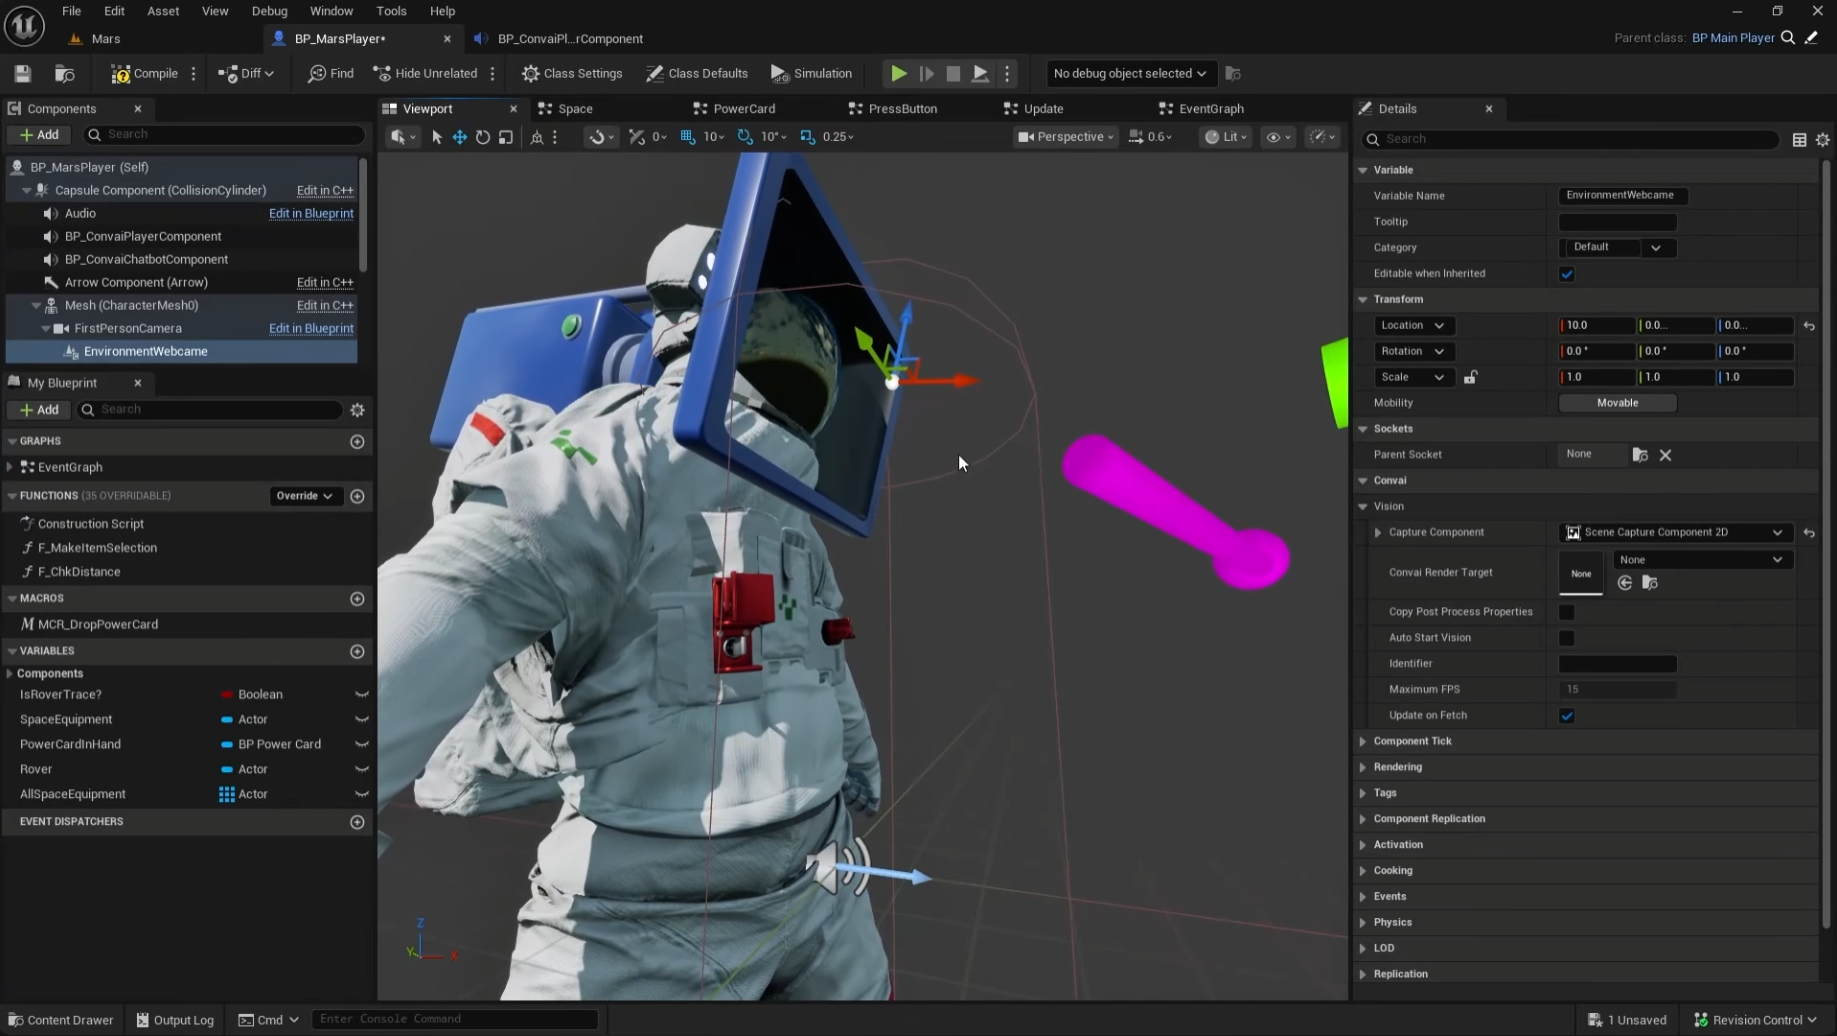
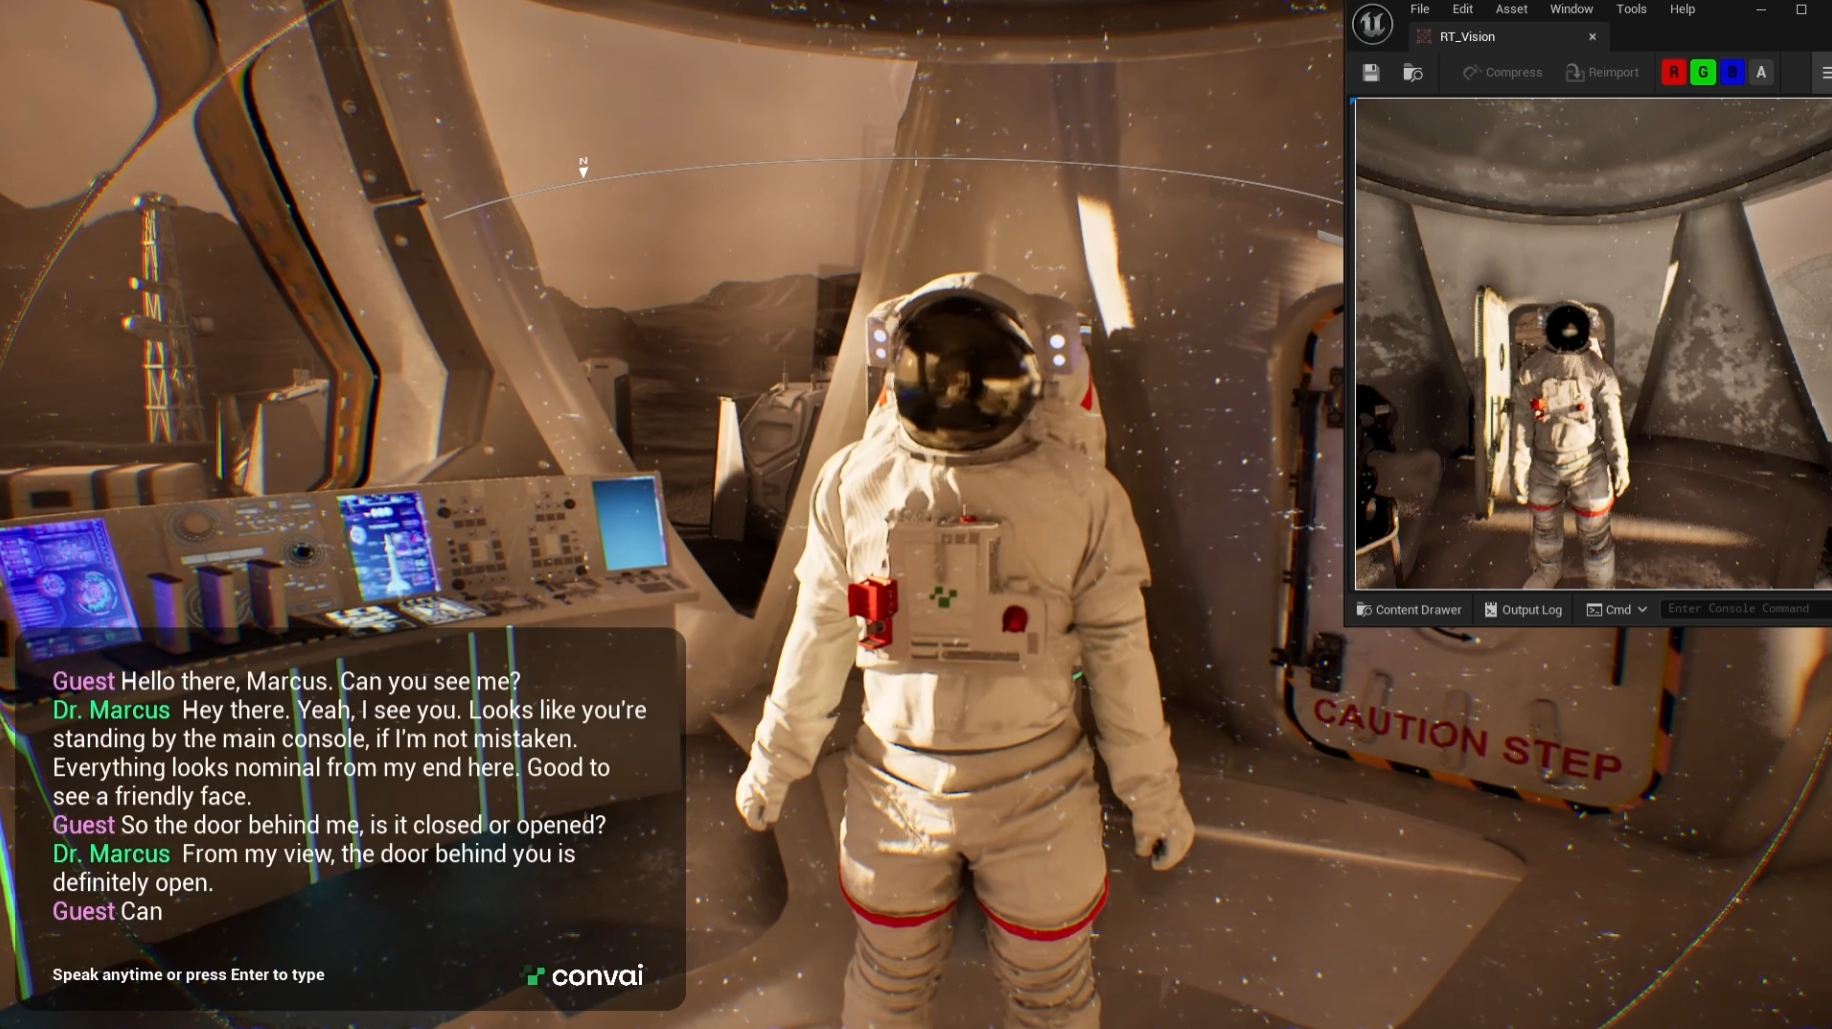
Now for the fun part: giving the AI actual sight.

5.1 Add the Webcam

  1. In your Player Blueprint, add an EnvironmentWebcam component.
  2. Important: Drag the EnvironmentWebcam onto your main camera (e.g., FirstPersonCamera) to parent it. This ensures the AI looks where you look.
  3. Set its Location and Rotation to 0,0,0 so it aligns perfectly.

5.2 Create a Vision Render Target

  1. In the Content Browser, right-click and choose Convai → Vision Render Target. Name it RT_Vision.
  2. Go back to your Player Blueprint → select EnvironmentWebcam.
  3. Set the Convai Render Target to your new RT_Vision file.
  4. Make sure Auto Start Vision is checked.

5.3 Talk to Your World

Hit Play. Look at something in your scene (like a solar panel or a specific tool) and ask:

"Hey, what is that?"

You might get a response like:

"I see a solar array. The main dish is angled toward the horizon and there appears to be dust buildup on the lower struts."

Follow up naturally:

"Is it aligned correctly?"

"Negative. Initiating alignment sequence for optimal signal lock."

That’s streaming vision + conversation. The AI isn’t guessing; it’s describing exactly what your camera sees.

Ideas for using this (Beyond Mars)

Once you’ve got this pattern working, you can reuse it in almost any Unreal project:

  • Field Training: Trainees point at a machine and ask, “Is this set up correctly?”
  • Maintenance Coach: An AI that validates you are looking at the right fuse before you pull it.
  • Guided Tours: A virtual museum guide that explains whatever artifact the player approaches.
  • Accessibility: An assistant that describes the environment to visually impaired players.

Troubleshooting Quick Hits

  • No AI Response: Double-check your Character ID in BP_ConvaiChatbotComponent.
  • Hands-free not working: Ensure "Enable Push To Talk" is unchecked in BP_ConvaiPlayerComponent.
  • Vision not working: Verify EnvironmentWebcam is parented to your camera and Auto Start Vision is checked. Open the RT_Vision file while playing to see if it's capturing video.

(Remember: For support, feedback, or to report bugs on the Beta, jump into the Convai Developer Forum.)

FAQ

Do I need C++?
No, not if you install at the engine level. Project-level installs do require a C++ project, but the engine-level Marketplace route works fine for Blueprint-driven games. 

Can I use this for characters that aren’t “in-suit”?
Yes. In this tutorial, the AI lives in the player blueprint (like an in-helmet assistant). For classic AI characters placed in the world, you’d attach BP_ConvaiChatbotComponent to that character’s blueprint instead. 

Does it support lip-sync?
Not yet in the Beta build. Lip-sync support is planned for future releases. 

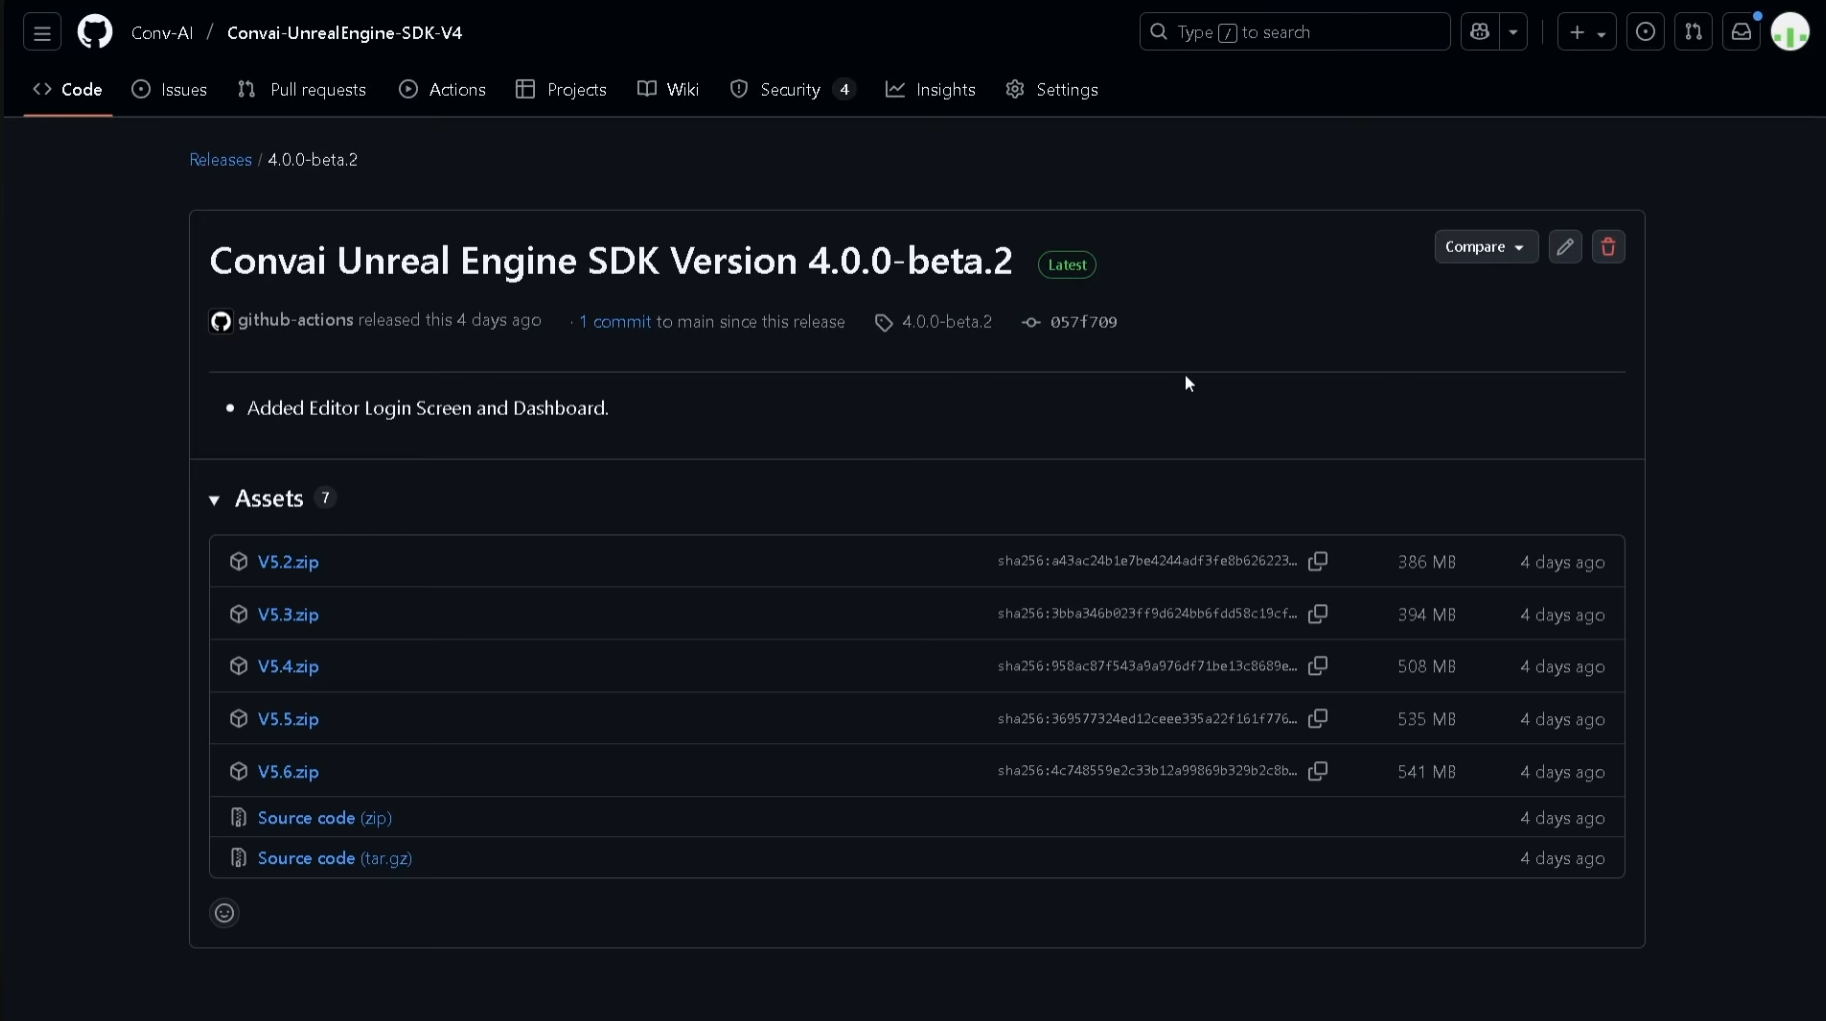
Where do I get updates and docs?
The latest plugin releases and setup guides are available in the Convai Docs under Unreal Engine Plugin (Beta) → Installation & Setup